Indoor Repeater - First Time Setup
Here is the first-time wizard for Indoor Repeater. You can refer to this wizard to complete the initial settings of your Indoor Repeater.
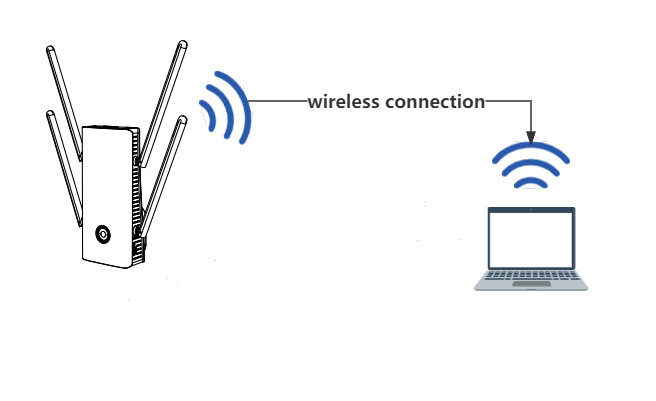
Every product requires initialization settings before use. Before initialization settings, we need to power on the device. After powering on, you need to connect the device. The different connection methods are listed below. You can choose any one of them and follow the steps to complete the connection.
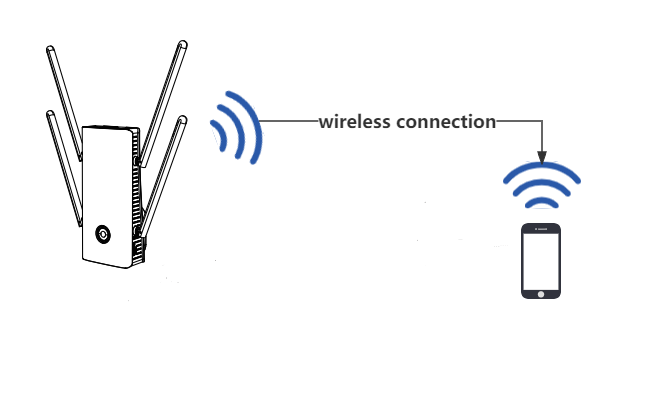
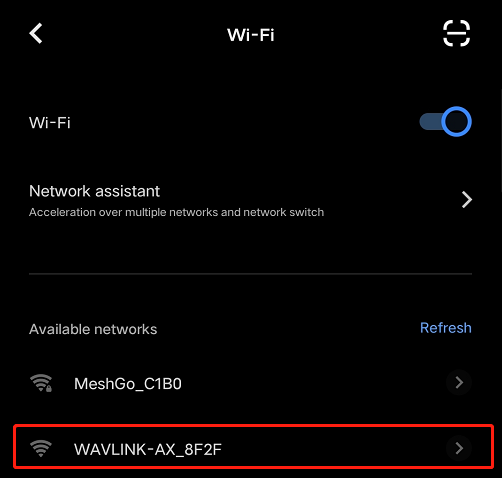
1 . Click Connect and it will automatically jump to the WiFi connection interface. You only need to correctly select your device WiFi and connect. Like the example below.(The WiFi name can be found in the user manual or the product bottom label.)
Default WiFi name
The default WiFi name can be found in the user manual or the product bottom label.
2.4G SSID: WAVLINK-AX_XXXX
5G SSID: WAVLINK-AX_5G_XXXX
"XXXX" in SSID is for illustrative purposes only, please refer to the last 4 digits of the MAC address of the label on the bottomof the product.
2 . After connection, it will automatically jump to the initialization configuration interface.
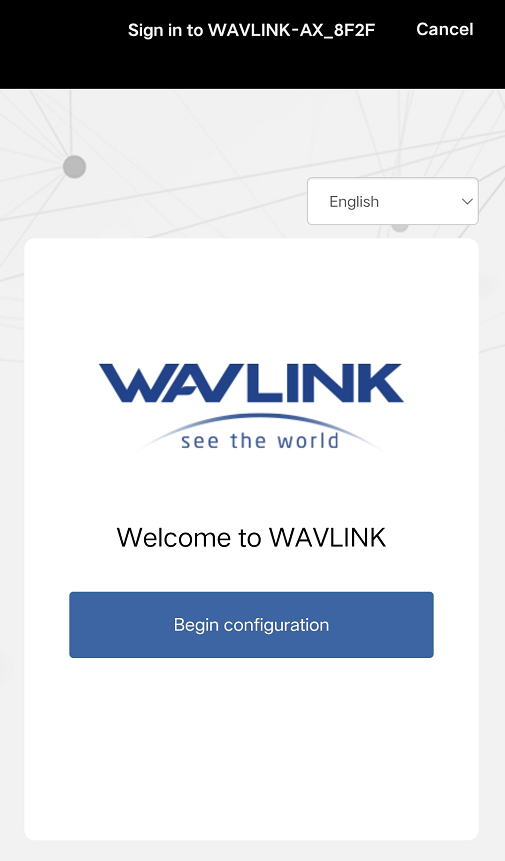
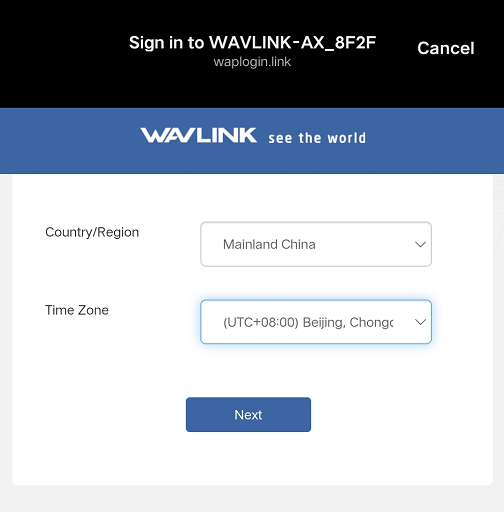
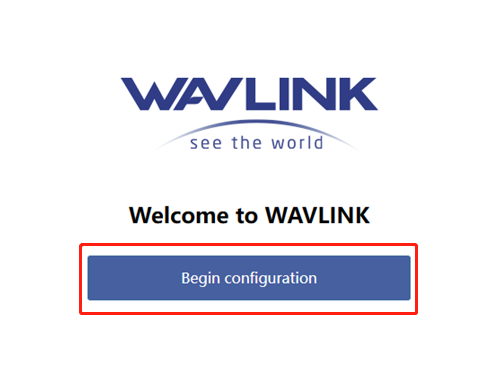
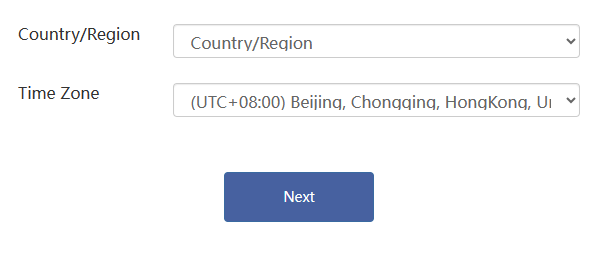
3 . Click "Begin configuration" to start the initial configuration of the router.Select the country and time zone.
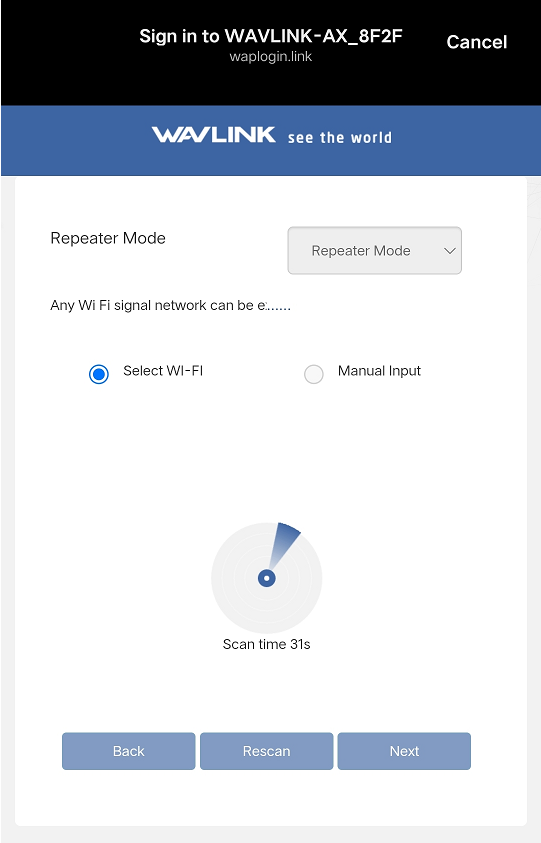
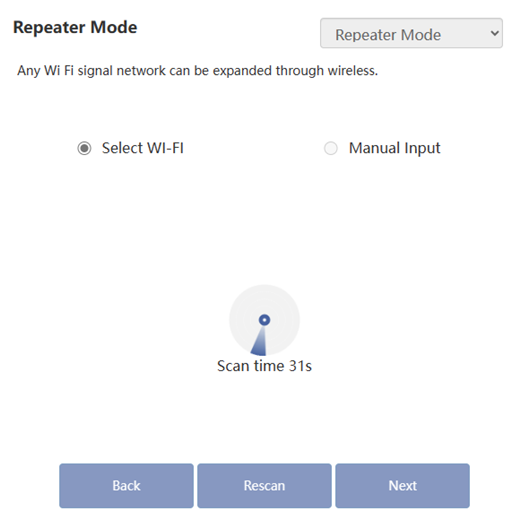
4 . Select a mode for the device. The default is Repeater Mode. If you want to choose other modes, please wait 31s. The following is a list of setting methods for different modes. You can choose any mode you want.
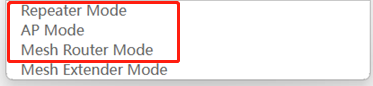
5 . There are three modes for you to choose from. The Mesh Extender Mode requires no configuration. The device is equivalent to the Mesh Extender Mode in the reset state.
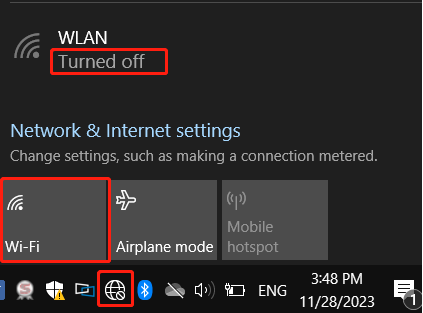
① Turn on the computer, click this icon  (this status of the icon indicates that the computer is not connected to the network), and a wireless connection pop-up window will appear,enable the WiFi function ,find your default WiFi name and click to connect to WiFi.
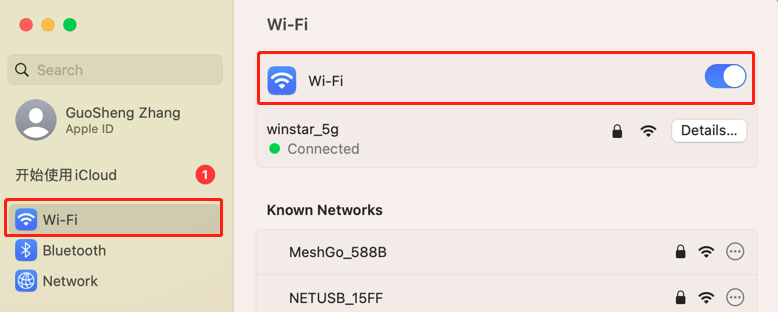
① Turn on the computer,click  ➡
➡  , enter the WiFi settings page to enable the WiFi function.
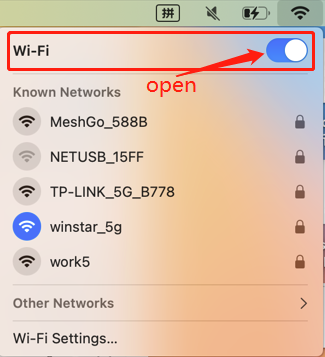
Or click the icon  on the system bar to enable the WiFi function.
Default WiFi name
The default WiFi name can be found in the user manual or the product bottom label.
2.4G SSID: WAVLINK-AX_XXXX
5G SSID: WAVLINK-AX_5G_XXXX
"XXXX" in SSID is for illustrative purposes only, please refer to the last 4 digits of the MAC address of the label on the bottomof the product.
1 . New devices or reset devices need to log in to the administrator interface for initialization settings.
2 . There are two ways to log in to the wavlink router management interface :
Log in using the domain name http://waplogin.link. (It is recommended that you use a domain name to log in. If you fail to log in using a domain name, please try to log in using an IP address.)

Log in using your IP address http://192.168.10.1.(If you want to log in using your IP address, please refer to the steps below.)

About IP address(192.168.10.1)
Different devices have different IP addresses. For specific IP addresses, please refer to the specific device manual or label on the bottom of the device.For the actual method of obtaining an IP address, refer to the following steps.
3 . After logging in to the device management interface, click "Begin configuration" to start configuration.
4 . Select country and time zone.
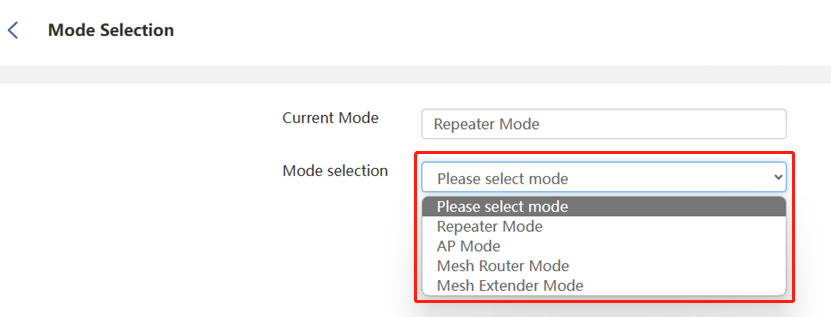
5 . Select a mode for the device. The default is Repeater Mode. If you want to choose another mode, please wait 31s. The following is a list of setting methods for different modes. You can choose any mode you want.
6 . There are three modes for you to choose from. The Mesh Extender Mode requires no configuration. The device is equivalent to the Mesh Extender Mode in the reset state.
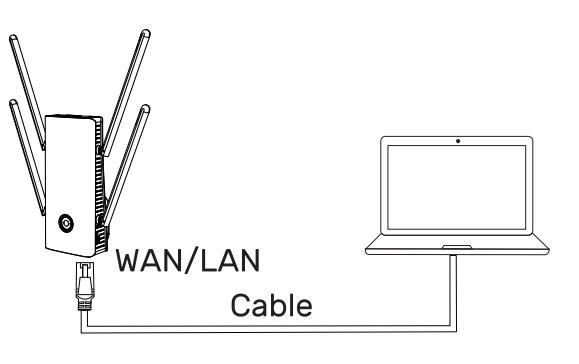
① To use wired access to the Internet, connect an Ethernet cable between the router's wan port and the Ethernet port on your computer. If your computer doesn't have an Ethernet port, try using a USB to Ethernet adapter.
② Connect one end of the first network cable to the network port of the computer, the other end to the LAN port of the router.
③ After successful connection, this icon "  " will be displayed on the computer taskbar.
① To use wired access to the Internet, connect an Ethernet cable between the router's wan port and the Ethernet port on your Mac. If your computer doesn't have an Ethernet port, try using a USB to Ethernet adapter.
② After the connection is successful, the device will automatically identify the network.
1 . New devices or reset devices need to log in to the administrator interface for initialization settings.
2 . There are two ways to log in to the wavlink router management interface :
Log in using the domain name http://waplogin.link. (It is recommended that you use a domain name to log in. If you fail to log in using a domain name, please try to log in using an IP address.)
Log in using your IP address http://192.168.10.1.(If you want to log in using your IP address, please refer to the steps below.)
About IP address(192.168.10.1)
Different devices have different IP addresses. For specific IP addresses, please refer to the specific device manual or label on the bottom of the device.For the actual method of obtaining an IP address, refer to the following steps.
3 . After logging in to the device management interface, click "Begin configuration" to start configuration.
4 . Select country and time zone.
5 . Select a mode for the device. The default is Repeater Mode. If you want to choose another mode, please wait 31s. The following is a list of setting methods for different modes. You can choose any mode you want.
6 . There are three modes for you to choose from. The Mesh Extender Mode requires no configuration. The device is equivalent to the Mesh Extender Mode in the reset state.
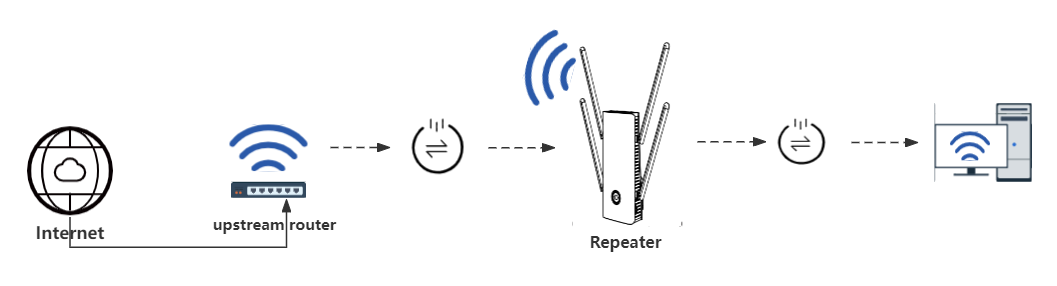
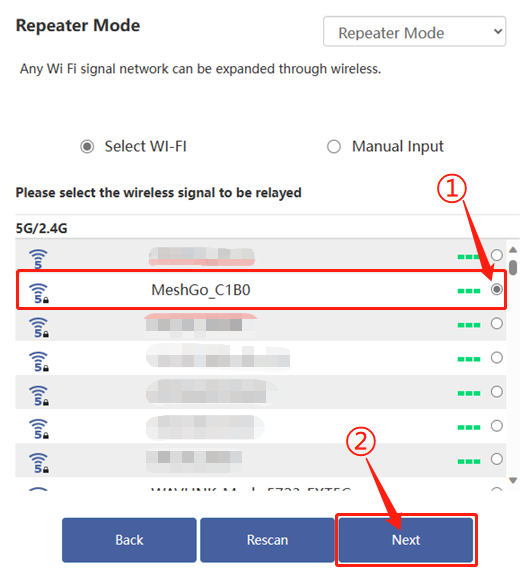
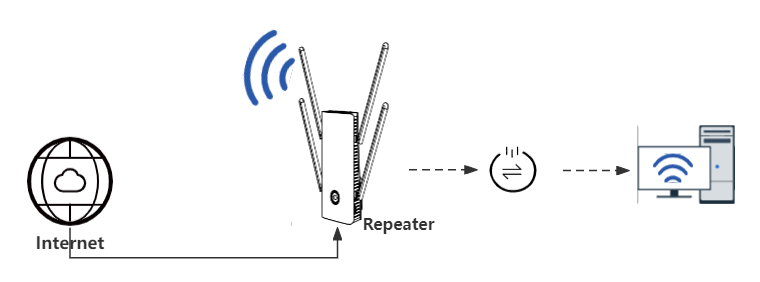
Repeater Mode : Any Wi Fi signal network can be expanded through wireless.
1 . Select a WiFi signal you want to extend the signal, and click Next after selecting it.
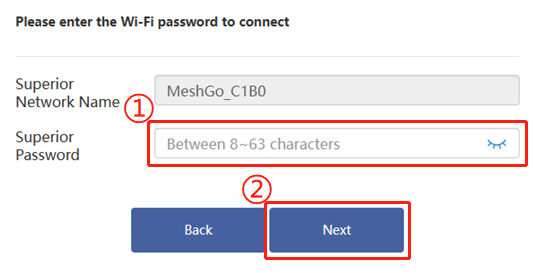
2 . Enter the password of the WiFi that requires signal expansion.
3 . You can choose to set a new SSID and password for the WiFi of this device, or you can keep the password consistent with the previous WiFi (Superior Network). (It is recommended that you use a strong password : The password contains uppercase and lowercase letters, numbers, and special symbols such as " @, ?, * ", etc. )
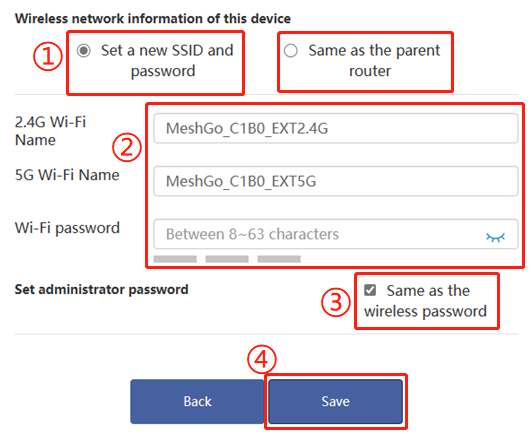
4 . After saving, wait for the settings to be applied. Wait about 1 minute and click Refresh.
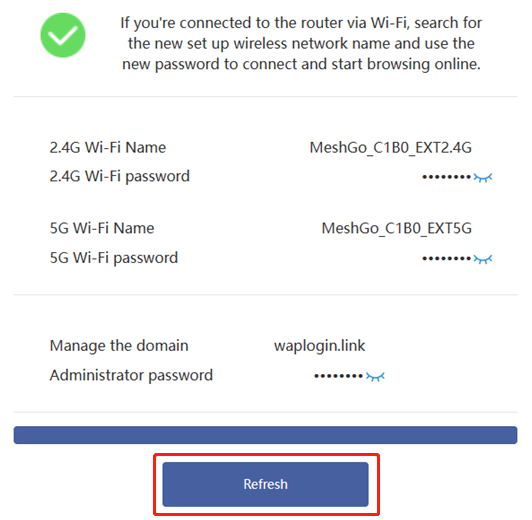
5 . After the initial configuration is refreshed, you need to log in to the management interface again and enter the password you just set to log in.
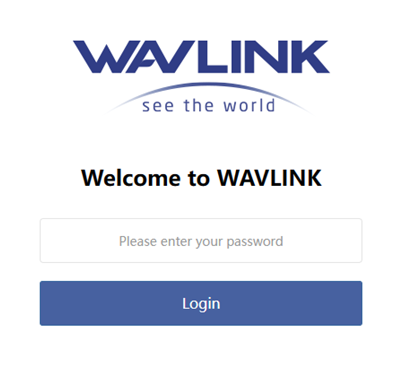
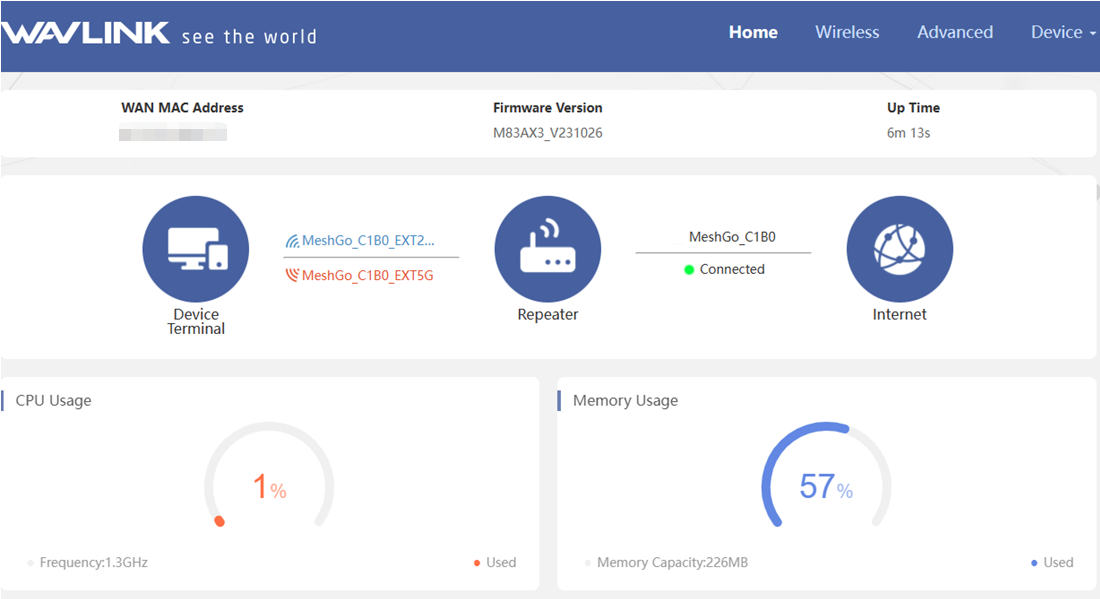
6 . After successful login, you can see the following interface.
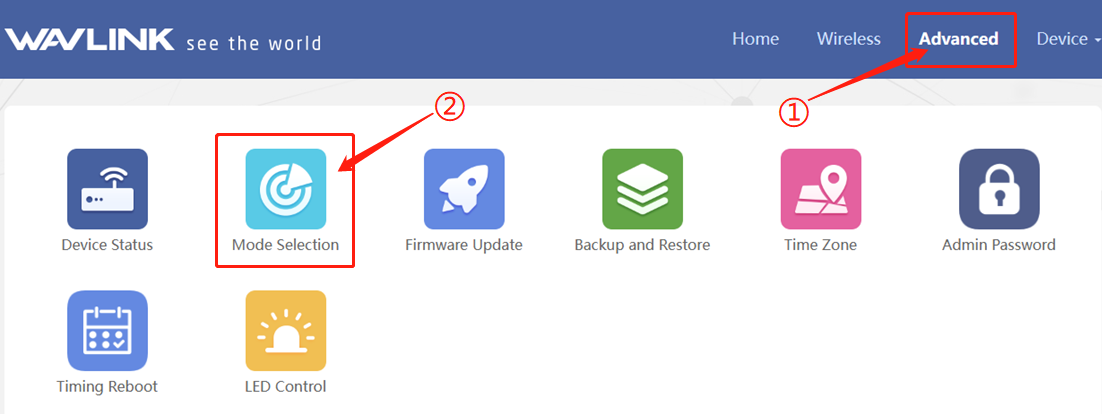
7 . If you want to change the device mode, you can go to Advanced > Mode Selection and select the mode you want to change.
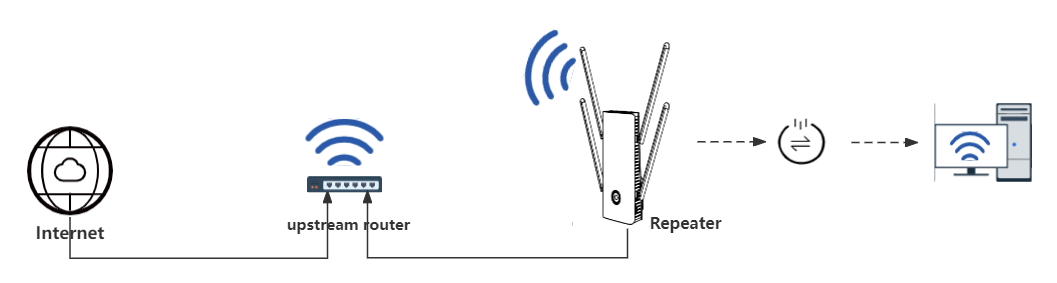
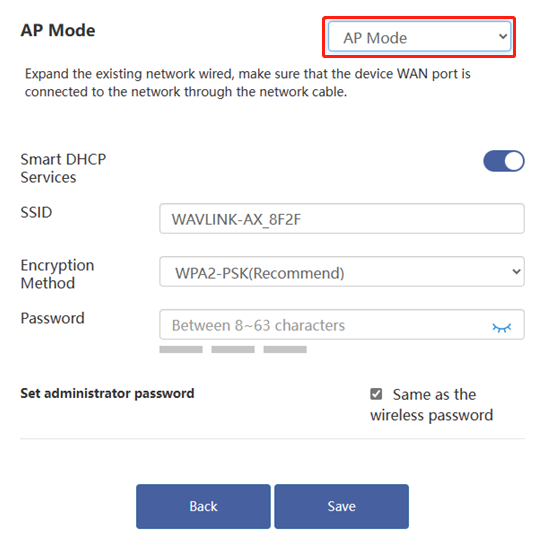
AP Mode : Expand the existing network wired, make sure that the device WAN port is connected to the network through the network cable.
1 . After switching to AP Mode, the system automatically turns on the DHCP service and sets the SSID and password of your WiFi. Click Save.(It is recommended that you use a strong password : The password contains uppercase and lowercase letters, numbers, and special symbols such as " @, ?, * ", etc. )
2 . After saving, wait for the settings to be applied. After waiting for about 1 minute, click Refresh.
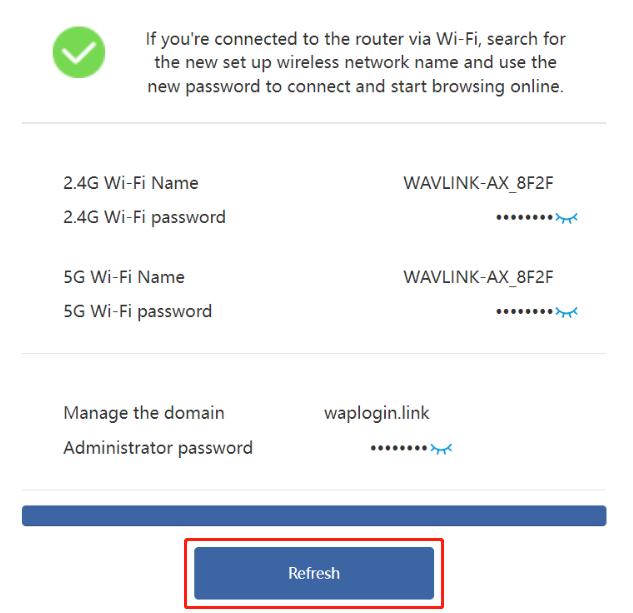
3 . After the initial configuration is refreshed, you need to log in to the management interface again and enter the password you just set to log in.
4 . After successful login, you can see the following interface.
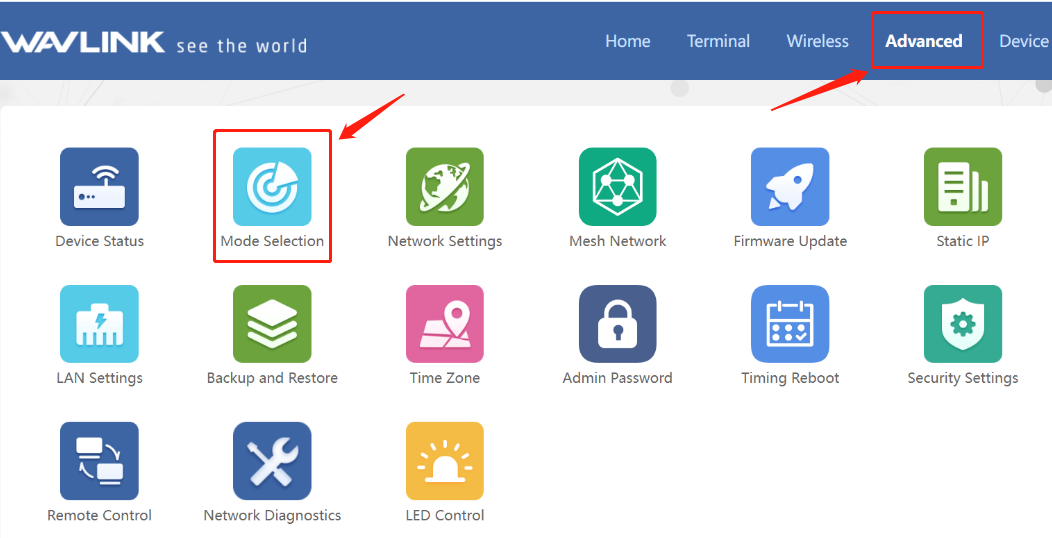
5 . If you want to change the device mode, you can go to Advanced > Mode Selection and select the mode you want to change.
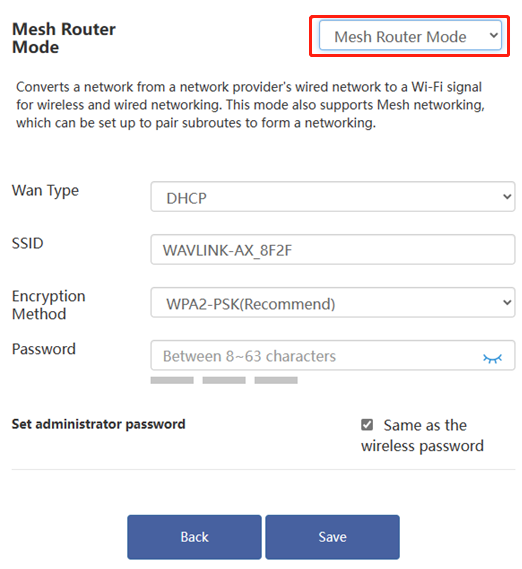
Mesh Mode : Converts a network from a network provider's wired network to a Wi-Fi signal for wireless and wired networking. This mode also supports Mesh networking, which can be set up to pair subroutes to form a networking.
The following are the steps to configure the main route. The sub-route only needs to be in reset state.
1 . After switching to Mesh Router Mode, the Wan Type defaults to DHCP (if you need to use PPPOE and Static IP, you need to set it manually), and set the SSID and password of your WiFi. Click Save.(It is recommended that you use a strong password : The password contains uppercase and lowercase letters, numbers, and special symbols such as " @, ?, * ", etc.)
2 . After saving, wait for the settings to be applied. After waiting for about 1 minute, click Refresh.
3 . After the initial configuration is refreshed, you need to log in to the management interface again and enter the password you just set to log in.
4 . After successful login, you can see the following interface.
5 . Mesh pairing. There are two ways to perform mesh pairing. It is recommended that you use the first method for pairing.
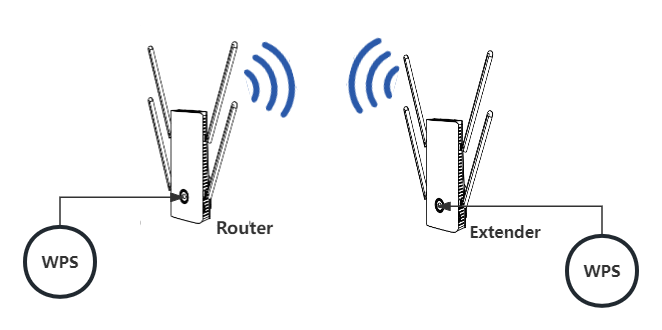
1 . Power on other Mesh routers, and other routers must be in reset state (press the reset button for more than six seconds to reset).
2 . Press and hold the "WPS" button of the main router for 2s. After pressing, the indicator light of the Mesh route flashes blue slowly.
3 . Within 2 minutes, press and hold the "WPS" button of the sub-router for two seconds, and after waiting 40-120 seconds, they will complete pairing independently. (When the device indicator light is solid blue, it means pairing is successful.)
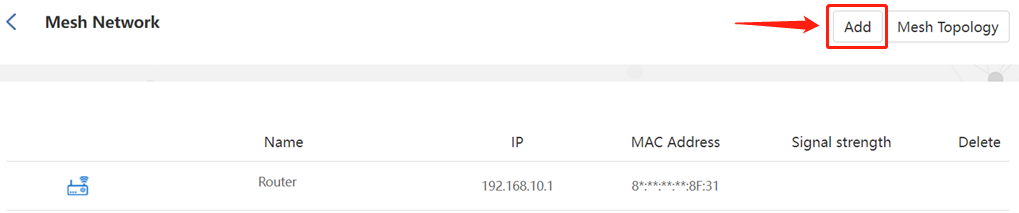
1 . Enter " Advanced > Mesh Network ".
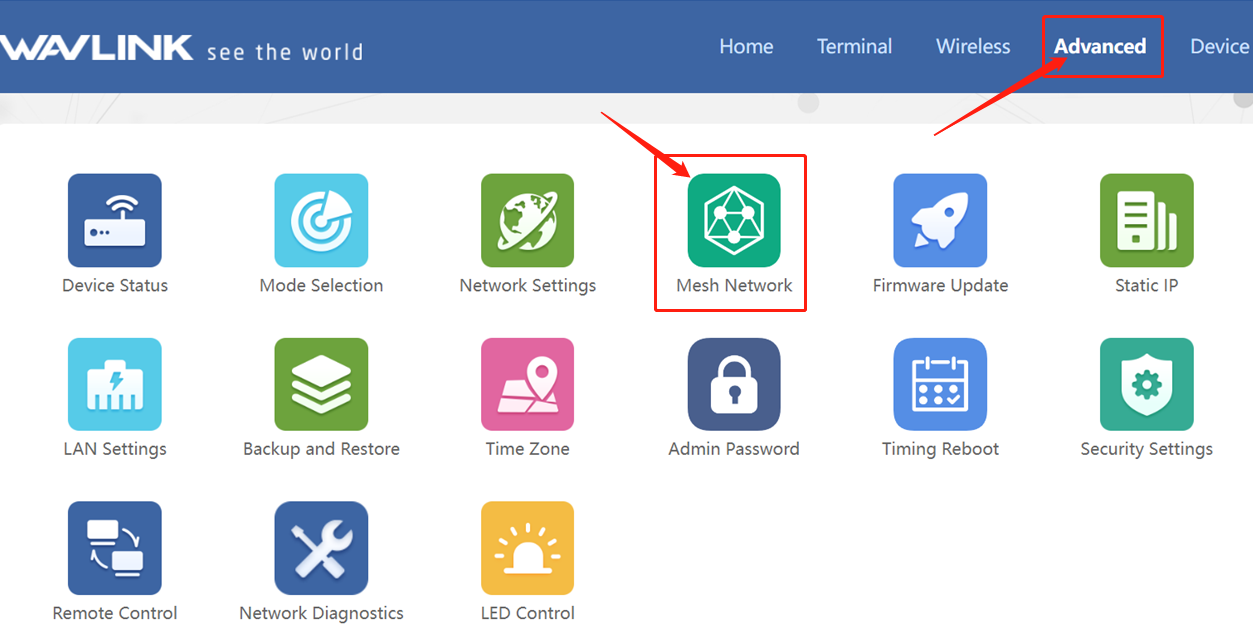
2 . Click on “Add” and then follow the prompts on the screen.
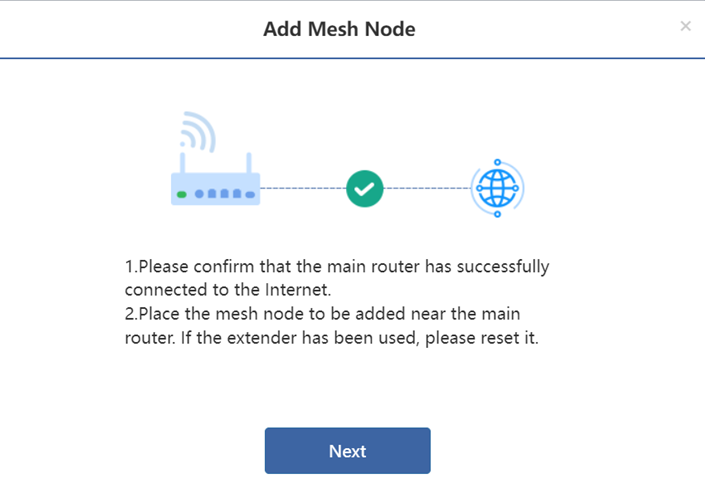
3 . After ensuring that other Mesh nodes are placed correctly and the master node network is connected, click "Next" on this page. If the Mesh node is already in use, please reset it.
4 . Make sure that the Mesh node has been powered on. After powering on, press and hold the WPS button of the mesh device for 2 seconds.
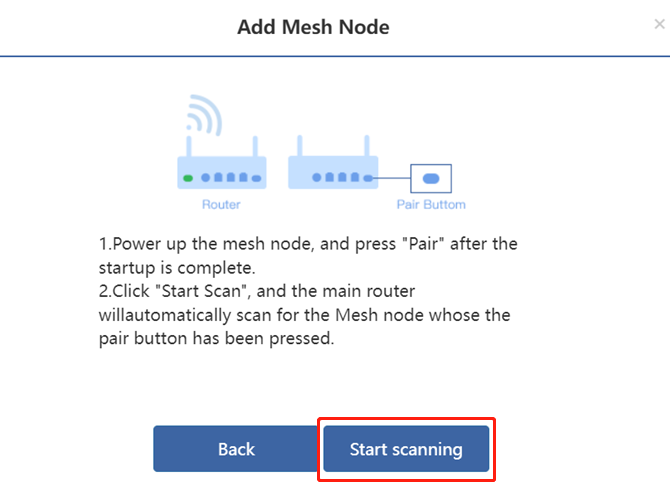
5 . Click "Start scanning" and wait for the scanning results.
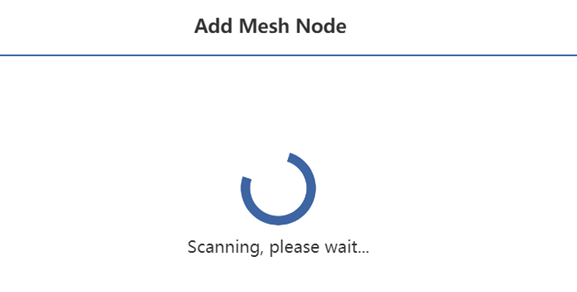
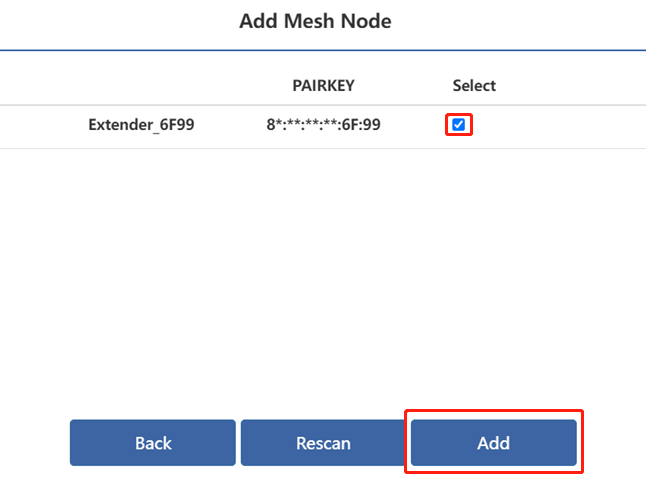
6 . If the scan is successful, device information will appear. Select the scanned device to add it.
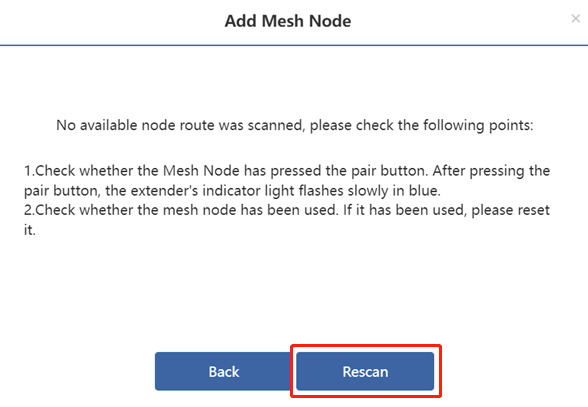
Scan node failed
If no available node routes are scanned, check the following points:
-
Check whether the Mesh node presses the pairing button. After pressing the pairing button, the indicator light of the Mesh node will flash blue slowly.
-
Check whether the Mesh node has been used. If it has been used, please reset it.
-
If none of the above problems appear, please click Rescan.
- After checking, add the device again.
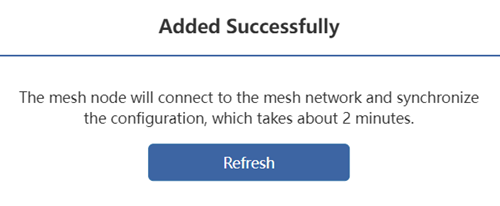
7 . Click Refresh after prompting that the addition is successful and wait for about two minutes.
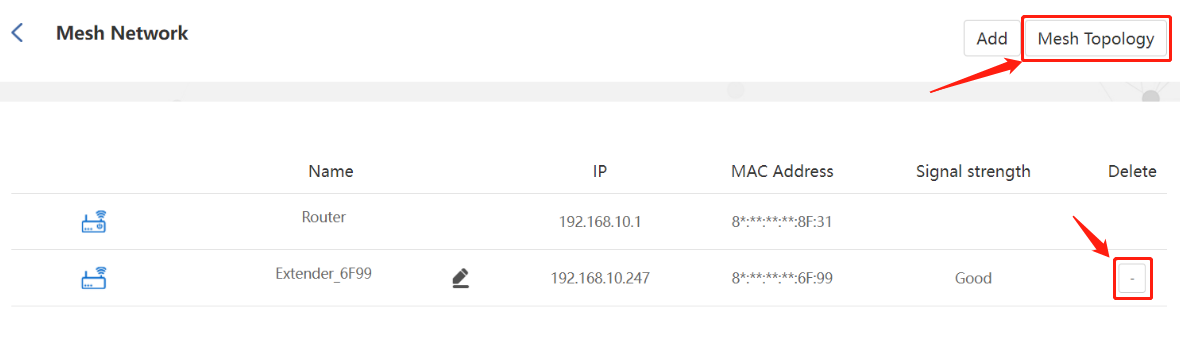
8 . After refreshing, you can view the information of the new device on the add page.If you need to view the Mesh Topology, you can click "Mesh Topology" in the upper right corner. If you want to delete the Extender, you can also click the delete option. As shown below.
Tip
A Mesh router device supports up to 7 (including existing device mesh devices).
6 . If you want to change the device mode, you can go to Advanced > Mode Selection and select the mode you want to change.
Mesh Extender Mode : This mode sets the device to the Mesh networking state to be paired, in which case the device will be scanned and paired by the surrounding primary device, waiting for the pairing to succeed.In this state, the device will wait for successful matching with specific wavlink mesh device to form a mesh network.
The master router in this case is wavlink routers, and its settings follow the wavlink router's mesh pairing method.
When the main route has been connected to the Internet and the main route has been initialized and configured, the sub-router only needs to be in the reset state(default factory settings) ,requiring no additional configuration..
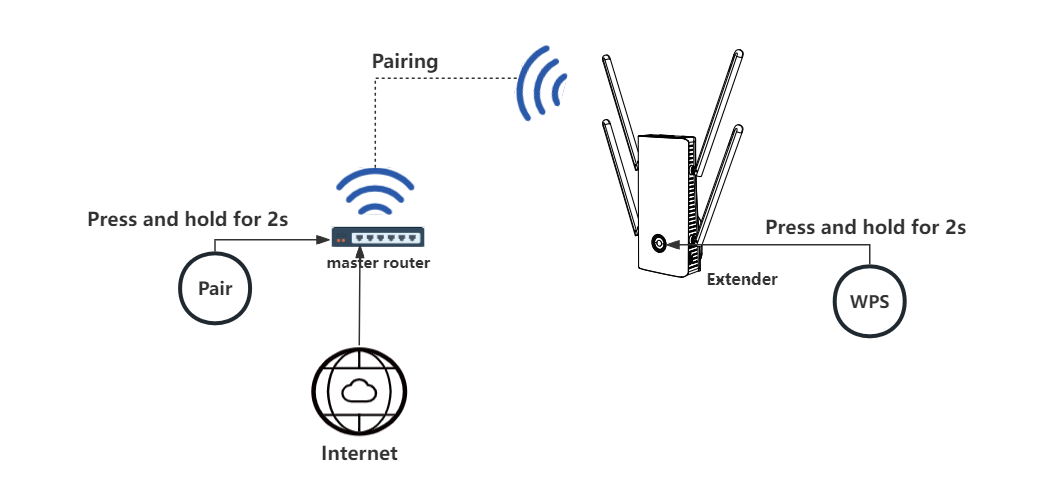
Please follow the provided steps below to create a mesh network :
1 . To initiate pairing, kindly press and hold the Pair button of the master router for 2 seconds (the indicator light will flash blue slowly upon pressing). Within the next two minutes, press and hold the Pair/WPS button of the mesh extender device for 2 seconds (the indicator light will also flash blue slowly upon pressing).
2 . The mesh extender device will automatically pair successfully within 40-120 seconds. Upon successful pairing, both the indicator lights of the mesh router and mesh extender device will display a solid blue light.