How to establish a Mesh network
More > Mesh > Mesh Devices
Log in to the device management page and go to More > Mesh > Mesh Devices to view relevant information.
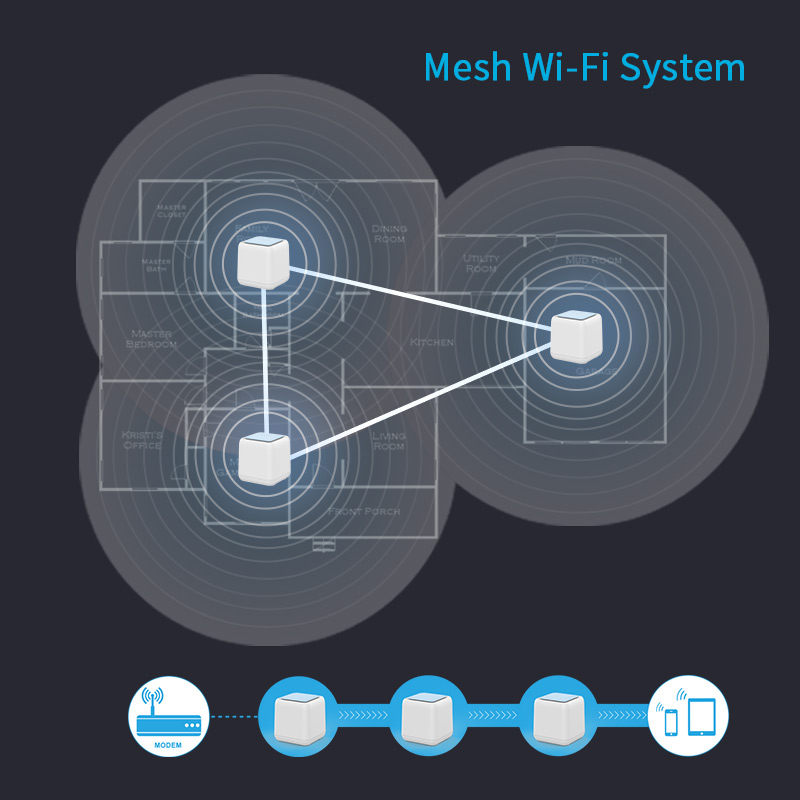
Mesh networks are widely used in many application scenarios, such as smart homes, Internet of Things, urban coverage, industrial automation, etc. It provides a resilient, reliable and flexible network solution suitable for environments that require a high degree of interconnectivity and self-organization.
Generally speaking, a Mesh router device supports up to 10 (including existing device mesh devices). So if you need to add more mesh devices to create a more powerful network in your home, you can simply pair your new mesh devices with your existing network.
Application introduction :
In the factory state, the Mesh routing set has no master or slave. Choose any router to power on, connect the Wan port to the Ethernet cable, and the networking configuration method is the same as that of other routers .
The steps for setting up Mesh routing networking are basically the same. This article takes one of the wavlink mesh packages as an example to introduce the Mesh routing networking setting method in detail. The setting methods for other Mesh routing are the same.
Setting method
1 . Select any router in the set to power on, and connect the Ethernet cable to the wan port.
2 . After connecting the line, please confirm that the corresponding interface (wan port) indicator light is always on or flashing.
Warm reminder
The default wireless signal name of the router can be found in the user manual. If you use a laptop, mobile phone or other wireless terminal to set up the router, please connect to the signal and follow the next step.
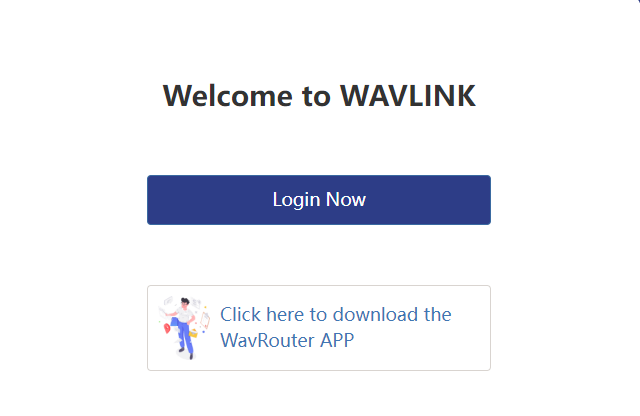
3 . Open the browser, clear the address bar and enter the router's management address: http://wavlogin.link. After logging in, click "Login Now" to enter the initial configuration interface.
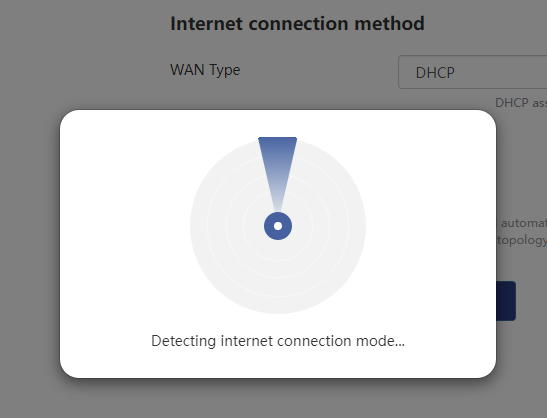
4 . After entering the initial configuration interface, the device system will automatically detect the Internet connection method for you. The Internet connection method defaults to DHCP. If you need to change the Internet connection method, please click the information box below.
Please click here to switch the Internet connection method
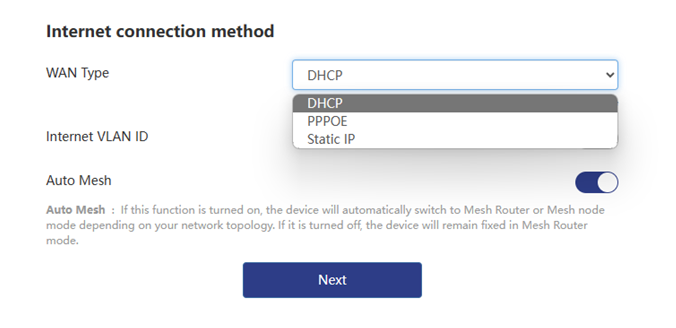
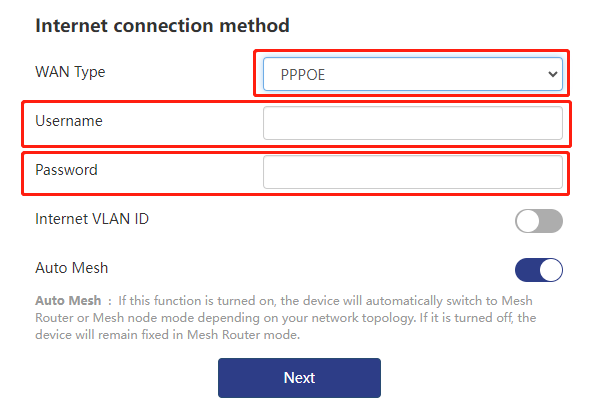
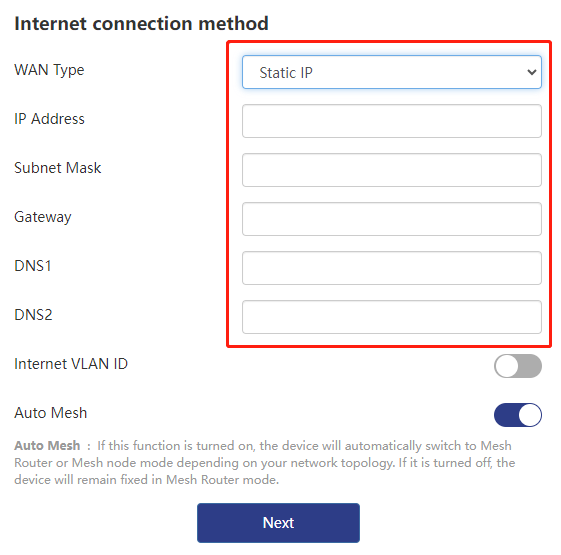
After entering the initial configuration page, you need to choose a internet connection method. DHCP is selected by default. If you need to connect to the Internet through dial-up, please choose PPPOE. If you need to configure a static IP, please choose Static IP. We have three internet connection methods. A link description is attached below, you can click on the link for details.
PPPOE
Username and password provided by the service provider (ISP) : The account name and password usually provided to you by the ISP for establishing a PPPoE connection.
Static IP
IP Address : You need to assign a static IP address to your device. Make sure the IP address is unique on your network and is on the correct subnet.
Subnet Mask : Determine the subnet mask you use. A common subnet mask is 255.255.255.0.
Default gateway : Enter the default gateway IP address of your network device (check the user manual).
DNS server : You can use the DNS server provided by your ISP, or choose another public DNS server, such as Google DNS (8.8.8.8) or Cloudflare DNS (1.1.1.1).
-
Internet VLAN ID : Some ISPs require users to set a VLAN ID on the router before they can access the Internet. If you find that dialing fails or obtaining an IP from the ISP fails, please check whether you need to set a VLAN ID.
-
Auto Mesh : If this function is turned on, the device will automatically switch to Mesh Router or Mesh node mode depending on your network topology. If it is turned off, the device will remain fixed in Mesh Router mode.
Please click on the link below to learn more
Differences in Internet access methods.Which Internet method should I choose?
5 . After selecting the Internet access method, enter the basic configuration (time zone, country, WiFi name, etc.) interface, select your country and time zone, and customize your WiFi name, password, and device management password (it is recommended that you use a strong password : The password contains uppercase and lowercase letters, numbers, and special symbols such as " @, ?, * ", etc.).
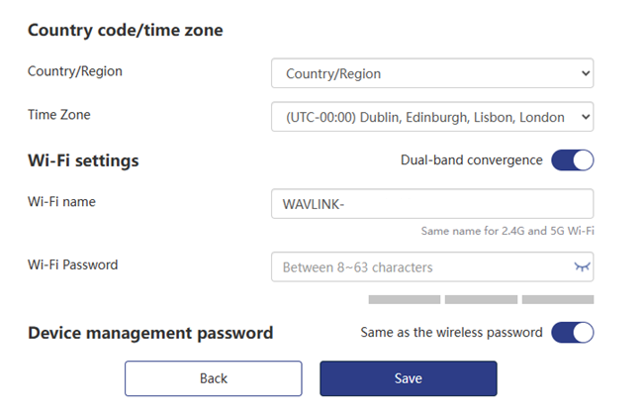
Please remember the password you set. After the configuration is completed and the interface is refreshed, you will use your customized password to log in to the management interface again.
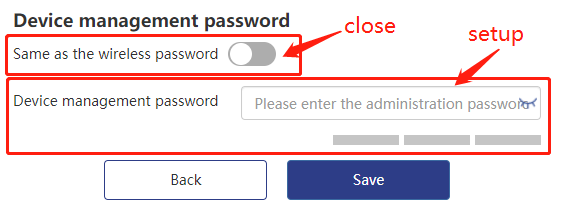
Device management password
Device management password : You can set it the same as the wireless password, or you can turn off the button to set the device management password and wireless password separately.
6 . After setting, click Save and wait for the device configuration to be completed. After the Refresh button appears, click Refresh to complete the initial setting of the device.
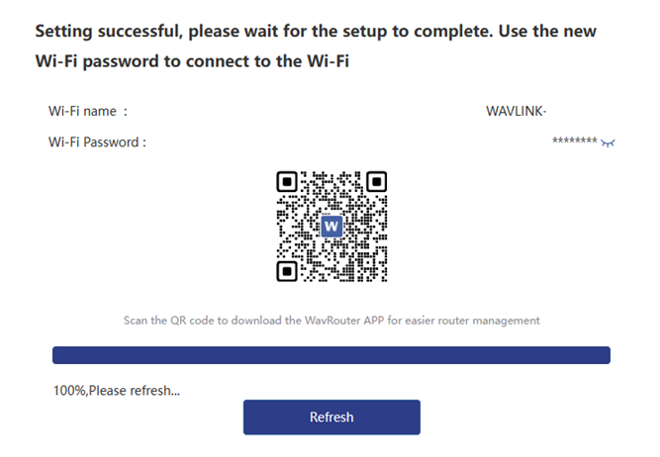
App Download
Scan the QR code with your mobile phone to download the Wav router app and manage your device conveniently.
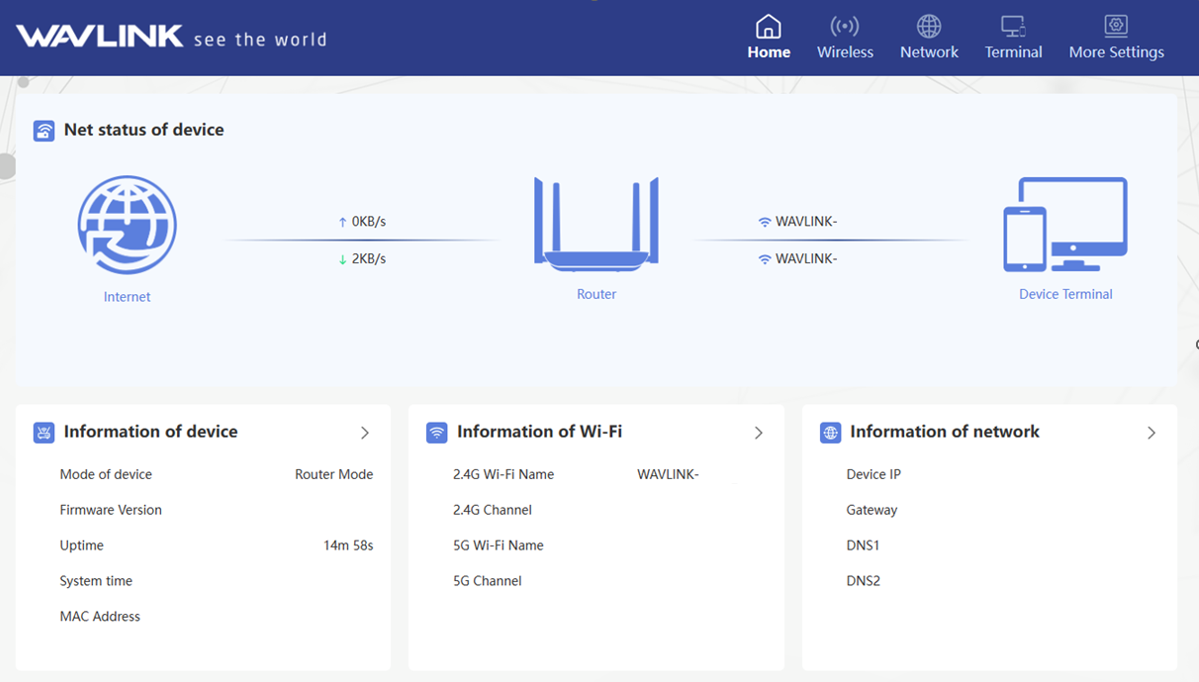
7 . After clicking Refresh, you need to re-enter the login password. This login password is the password you customized. After entering the password, click Login to log in. After successful login, you can see the following page.
8 . Mesh pairing. There are two ways to perform mesh pairing. It is recommended that you use the first method for pairing.
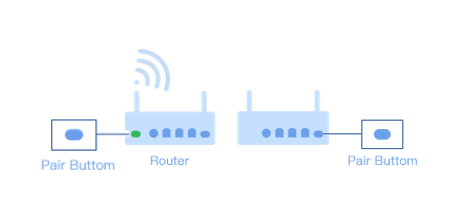
1 . Power on all Mesh devices,and ensure that the devices are in the reset state (press the reset button for more than six seconds to reset each device).
2 . Within 2 minutes, press and hold the "Pair" button of the Mesh main router and Mesh devices for 2 seconds. After pressing and holding for two seconds, the indicator light flashes blue slowly.
3 . Wait 40-120 seconds to complete the pairing (the Mesh indicator light turns solid blue to indicate a successful pairing).
1 . Open the browser, enter http://192.168.x.x (find it in the user manual) or http://wavlogin.link in the address bar of the browser, then press the Enter key on the keyboard to enter the device management interface.


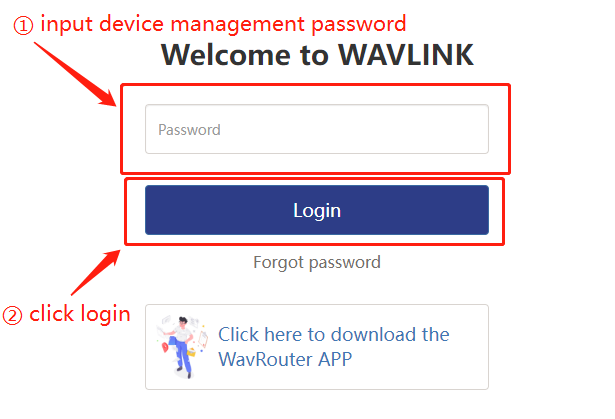
2 . Enter your device management password to log in to the device management page. (This password is the password set during initial configuration. If the device independent password setting is not turned on, the device management password is the same as the WiFi password.)
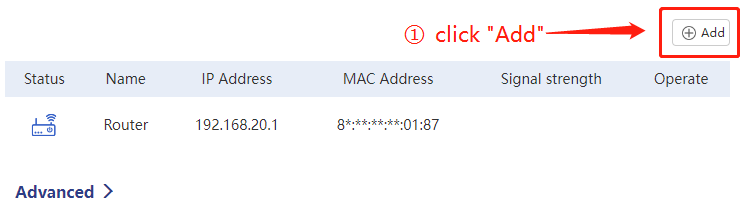
3 . Click "More Settings" ➡ "Mesh Network" ➡ "Mesh Table"
Tip
-
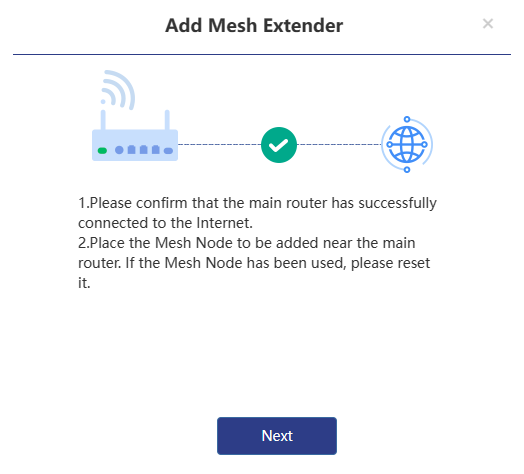
Before adding a device,please confirm that the main router has successfully connected to the Internet.
-
Place the Mesh Node to be added near the main router. If the Mesh Node has been used, please reset it.(Press and hold for more than 6 seconds to reset the mesh device)
-
Power on the Mesh node, and after it has started up, press the pair button.
4 . Click on “Add” and then follow the prompts on the screen.
5 . After ensuring that other Mesh nodes are placed correctly and the master node network is connected, click "Next" on this page. If the Mesh node is already in use, please reset it.
6 . Make sure that the Mesh node has been powered on. After powering on, press and hold the Pair button of the mesh device for 2 seconds.
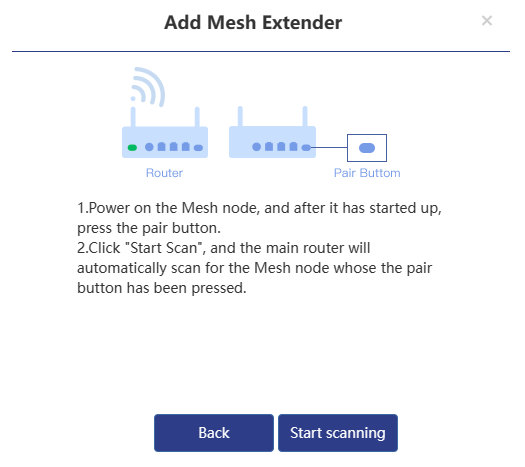
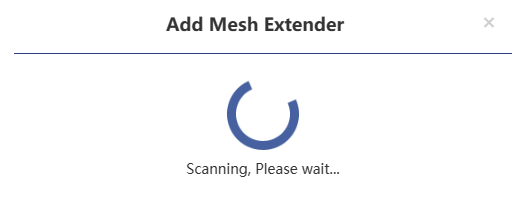
7 . Click "Start scanning" and wait for the scanning results.
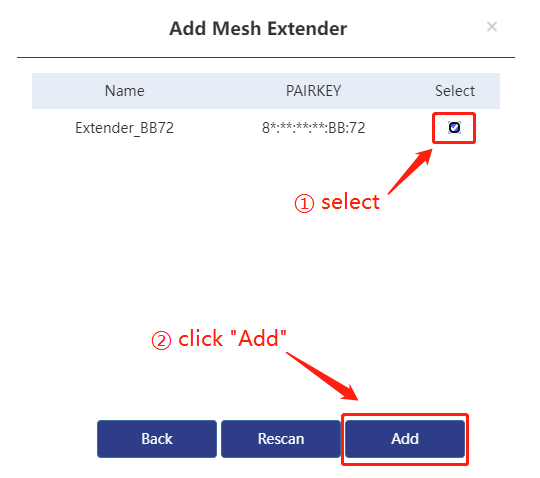
8 . If the scan is successful, device information will appear. Select the scanned device to add it.
Scan node failed
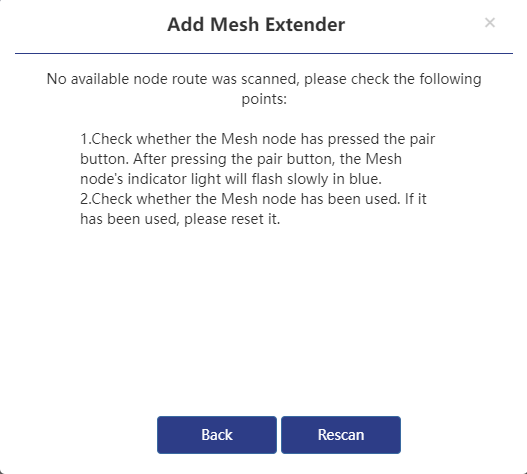
If no available node routes are scanned, check the following points:
-
Check whether the Mesh node presses the pairing button. After pressing the pairing button, the indicator light of the Mesh node will flash blue slowly.
-
Check whether the Mesh node has been used. If it has been used, please reset it.
-
If none of the above problems appear, please click Rescan.
- After checking, add the device again.
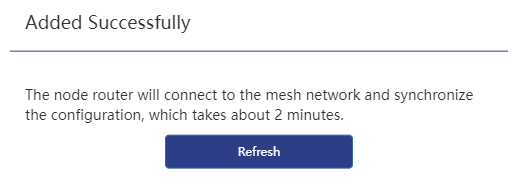
9 . Click Refresh after prompting that the addition is successful and wait for about two minutes.
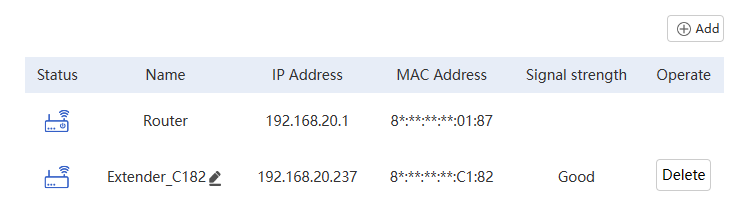
10 . After refreshing, you can view the information of the new device on the add page.You can modify the device name on this page so that you can better identify it.
Tip
A Mesh router device supports up to 10 (including existing device mesh devices).
Advanced
Roaming
Wireless roaming technology allows your devices to seamlessly switch between two mesh routers. When you move away from one router and closer to another, it will automatically disconnect the current connection and connect to the closer router for a smoother network user experience. No manual intervention is required during the switch and it will not affect the network connection.
Roaming Threshold
The wireless roaming trigger threshold should only be set by experienced professionals. If you lack professional experience in setting the roaming trigger threshold, it is recommended that you keep the default settings to avoid negative impacts on the network user experience.
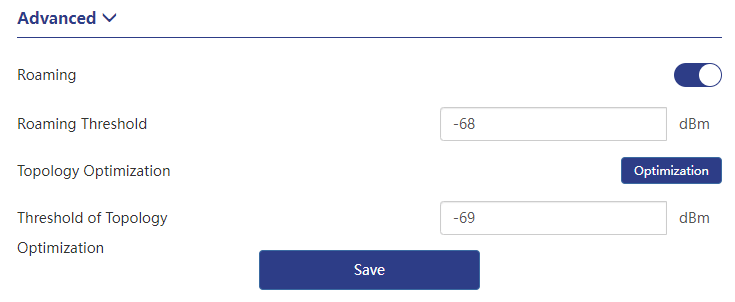
Topology Optimization
When your paired devices are greater than or equal to 3 devices, after all devices are paired, optimization can be turned on.
This function can automatically adjust the optimal path according to the signal strength between the devices, so as to ensure that all sub-routes and corresponding upper-level devices have the best signal connection status for optimal network coverage.
Threshold of Topology Optimization
You can adjust the signal threshold triggered by topology optimization to obtain the best mesh network coverage. If you do not have professional experience in setting this, we recommend that you set it according to the default value.