USB Print Service
This feature is currently only available to routers.
The USB Print Service allows you to connect to a USB printer. Under the router's network, multiple devices can access and use the printer at the same time.
USB Print Service can help printers that do not have their own wireless connection function connect to the router through the USB interface and print through the router's wireless network.
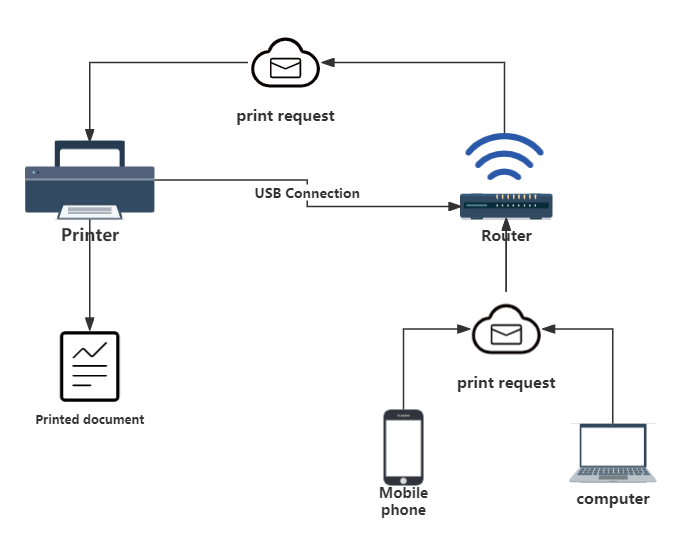
By enabling the USB Print Service, the router acts as a relay station, establishing a communication bridge between the user device and the printer. Users can send print jobs to a printer connected to the router's USB port, and the router is responsible for transferring the print jobs to the printer and completing the print operation.
In this way, users can conveniently print to printers without WiFi capabilities over a wireless network without directly connecting to the printer.
The following is a detailed use case of the router's USB printing service, including environment preparation and points that need attention :
Environmental preparation :
-
A wavlink router that supports USB printing service. Not all routers support USB printing service. You need to confirm whether the router supports it and enable it. If you cannot confirm, you can find relevant information in the router's settings interface or user manual.
-
A printer can be connected to the router through the USB interface. Before connecting, you need to install the printer driver and software so that the router can correctly recognize and use the printer.
-
Some files or documents that need to be printed.
Here are the detailed steps for printing using your router’s USB printing service :
1 . Connect the printer to the USB port of the router, open the browser and enter http://wavlogin.link or the IP address of the router management interface (you can find it in the user manual) in the address bar to log in to the router management interface. After logging in, enter "More Settings > USB > USB Print Service" Interface enables USB printing service.
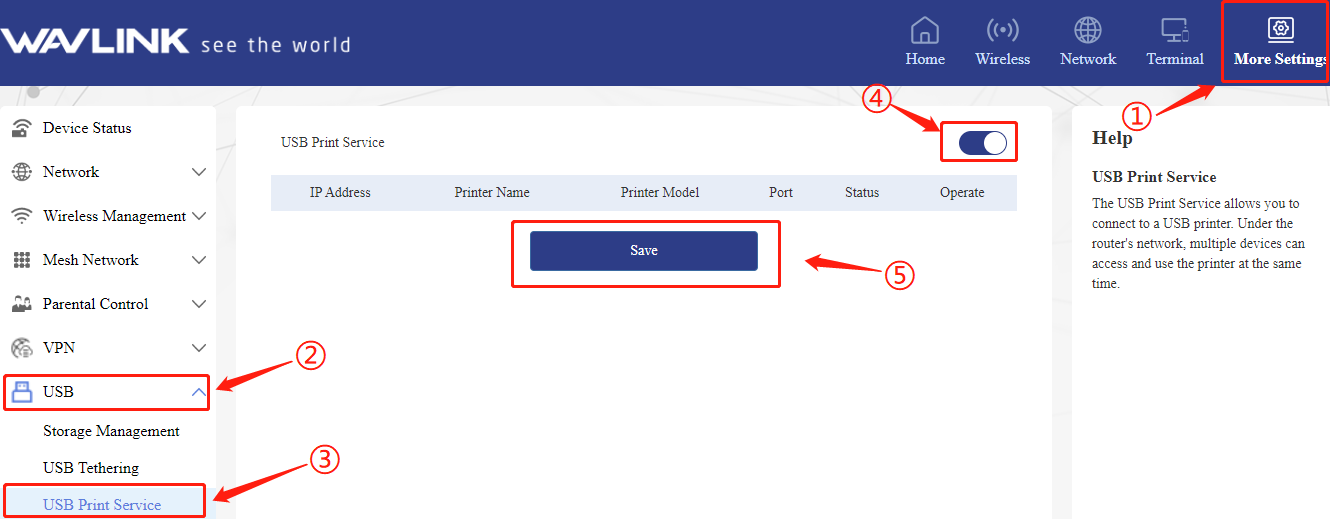
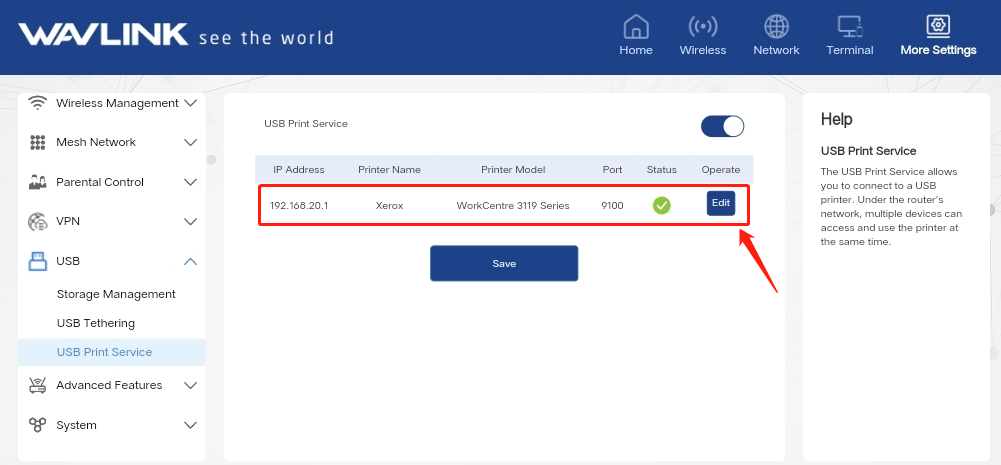
After connecting and turning on this function, the system will automatically detect the printer.
2 . Install the printer driver and software on your device such as laptop, smartphone, etc. If you have already installed the driver on your printer, you do not need to install it again. These software and drivers can usually be downloaded from the printer's official website. If you cannot find it, please contact the printer manufacturer.
(Please see here for how to install drivers or software on computers and mobile phones.)
1 . Confirm the printer model : First, determine the printer model you are using and find the latest driver for your operating system on the printer's official website or the manufacturer's support page. Typically these drivers can be found in the Support or Downloads section.
2 . Download the driver : Find the driver download link for your operating system on the official website and click to download. Make sure to select the correct operating system version (e.g. Windows 10, macOS, etc.).
3 . Install the driver : After the download is complete, run the downloaded driver installation file. When prompted, select the default options and accept the license agreement.

You only need to download the app on your phone,open the Google app store and download PrintHand.You can also visit the PrintHand official website (https://printhand.com/) to download.
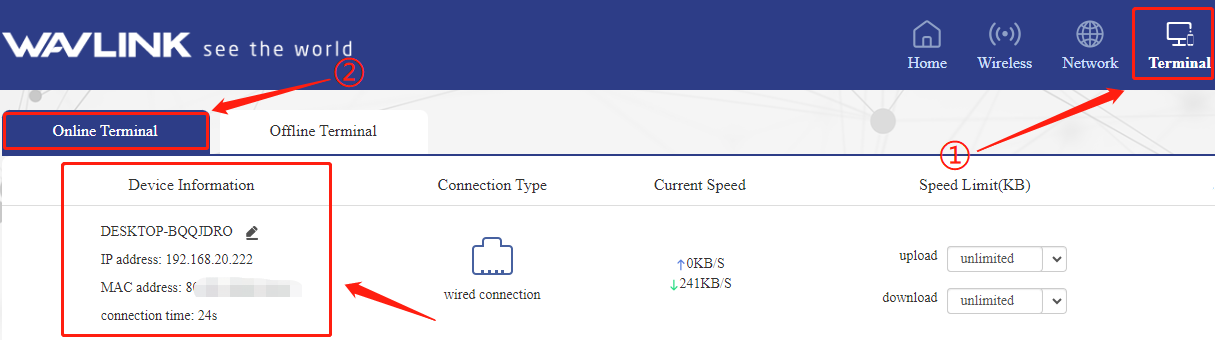
3 . Connect your device to your router's wireless network. Make sure your device and router are connected to the same LAN and can communicate with each other.(You can check whether your device is connected in "Terminal > Online" of the router management interface.)
4 . Add a printer. Here are the methods for connecting the printer to your computer and mobile phone.
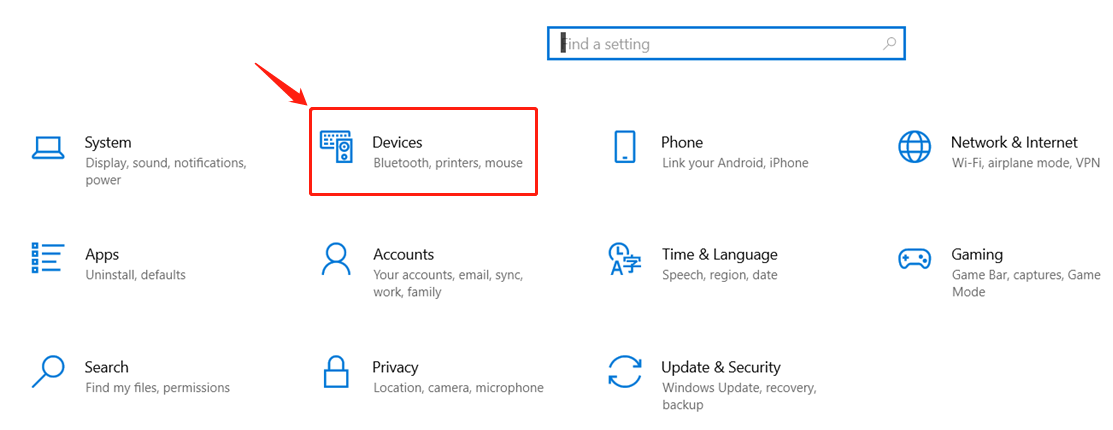
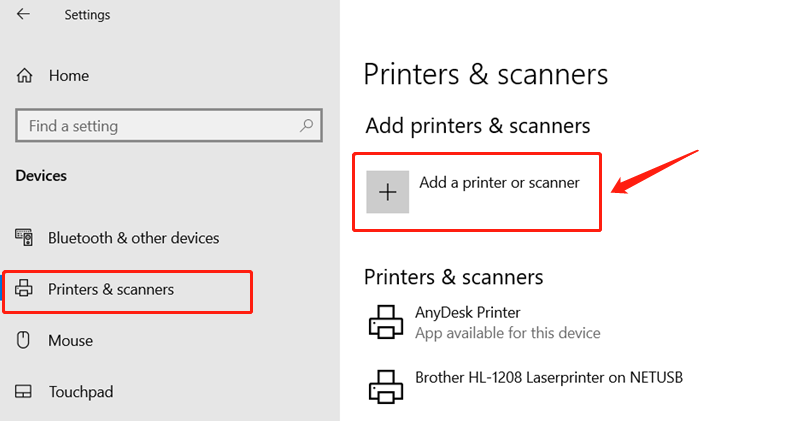
1 . Select the Start button  , then select
  Settings > Devices > Printers & Scanners > Add a printer or scanner.
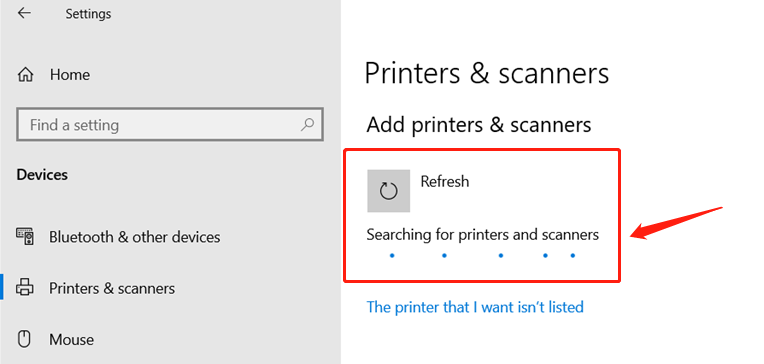
2 . Wait for it to find a nearby printer, then select the printer you want to use and select "Add Device". If you want to delete the printer later, just highlight it and select Delete.
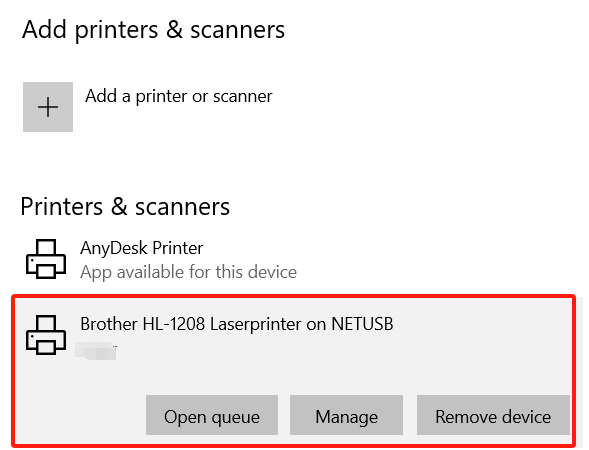
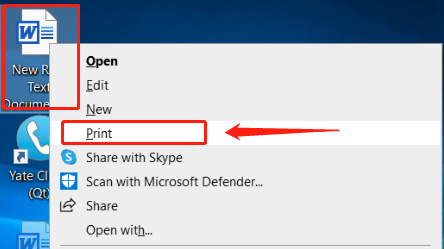
3 . Open the document or file you want to print and select the Print option. In the print dialog box, select the connected router and printer, and set other printing options (such as paper size, print quality, etc.). After completing the settings, click the "Print" button.
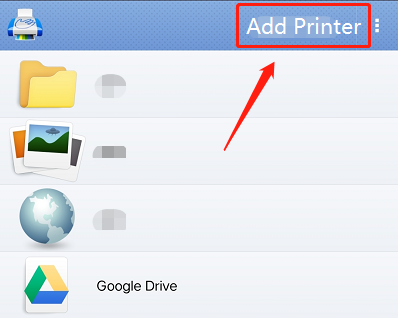
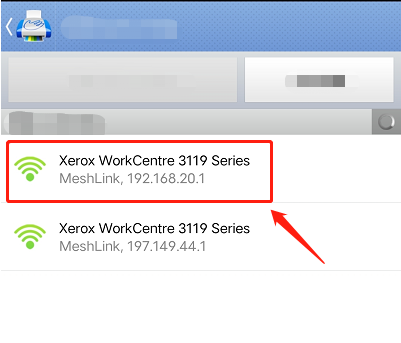
1 . Enter PrintHand APP and click Add Printer in the upper right corner.
2 . Click to add WiFi printer.
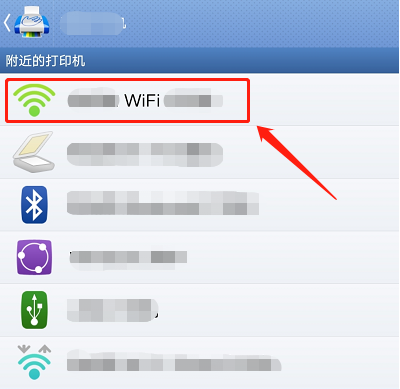
3 . Click on the printer you want to add.
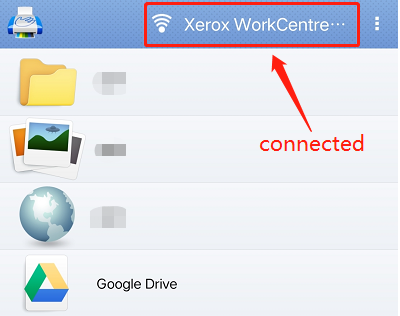
4 . The picture below shows that the addition is successful.
5 . Select the file you need to print.
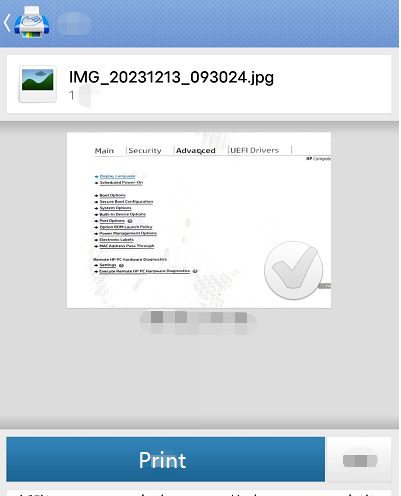
5 . The router will send the print job to the printer connected to its USB port and complete the printing operation. You can view the print results on the printer.
Precautions
You need to pay attention to the following points when using the router’s USB printing service:
- Make sure that both the router and the printer support the USB printing service and are enabled correctly.
- Before connecting the printer, please install its driver or software and confirm that the printer can work properly.
If you still have problems during use, you can contact us.